Installing Eclipse and the Android Development Tools (ADT)
This tutorial will work but see Android SDK Download Available for newer instructions.
Now that MOTODEV Studio has become MOTODEV Core Plugins, its main benefit of providing a single install for Android Development is no longer viable. The folks at Motorola have decided to move the Studio Tools into the Android Open Source Project (AOSP). While this is a good idea from a developer's standpoint, from an academic standpoint, this presents a problem. Simply put, installing the Core Plugins is NOT trivial. Of course you can still follow the install routine specified for the new Core Plugins, but, for the purposes of following the text book, Installing Eclipse with the ADT is more than sufficient.
Note: Should you decide to install Eclipse and the ADT, some of the screen captures in the book will be slightly different and, of course, the information specific to features exclusive to MOTODEV Studio won't apply.
1. Download and install the latest Java Development Kit here:
http://www.oracle.com/technetwork/java/javase/downloads/index.html
Make sure you download and install the correct package for your operating system. You may need to reboot at the end of the install routine.
2. Download the Eclipse for Mobile Developers Package here:
http://www.eclipse.org/downloads/
Make sure you download the correct package for your operating system. Unpack the downloaded file and run the executable. For Windows, run eclipse.exe. For Mac, double-click the Eclipse app. For Linux, run 'eclipse.'
3. From the Help menu, choose Eclipse Marketplace. Click on the Popular tab and locate Android Development Tools for Eclipse. Click Install. Follow the prompts, accept the license agreements, and restart Eclipse.

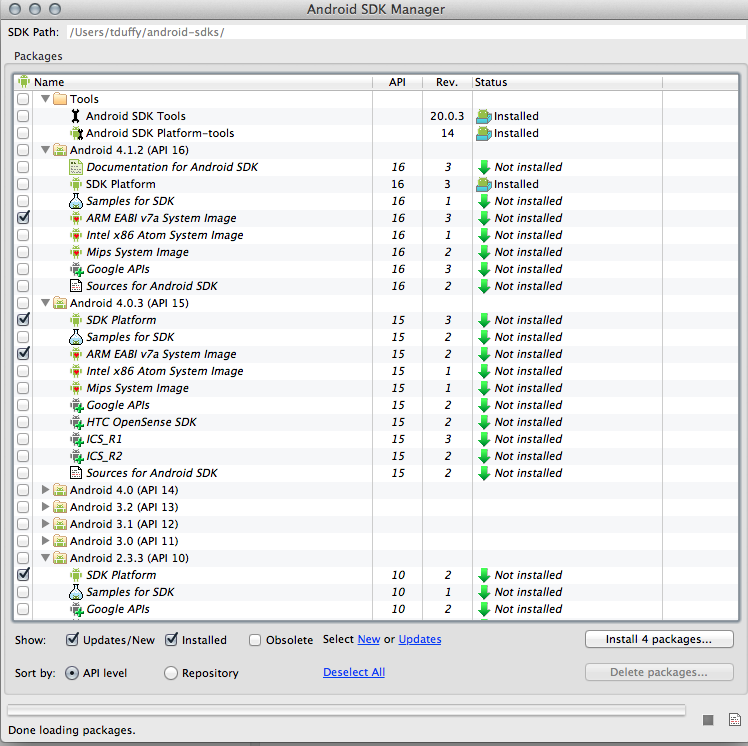
4. From the Window menu, choose Android SDK Manager. I had the Android Tools, the latest Android SDK (Currently 4.1.x - Jelly Bean) and the Android 2.2 (Froyo) SDK already installed from my Studio installation. If you don't have those packages installed, you should probably install them. You will need to install System Images for platforms 4.0 or greater. For older platforms, the system image is built into the platform. You may also install more SDKs. I chose to install SDK 4.0.3 (Ice Cream Sandwich) and SDK 2.3.3 (Gingerbread) as well. As I mention in the book, if you target Froyo, you will enable roughly 93% of devices currently deployed to run your apps. I chose ICS and Gingerbread because I currently own devices running those systems. I can test my apps easily on hardware I already own. Depending on your connection speed and how many packages you choose to download, this could take some time.
5. You will need to create Android Virtual Devices (AVDs) to execute your Android apps. From the Window menu, choose AVD Manager. Click New to create a new AVD. I chose to create an AVD for each of the platforms I have installed. This allows me to test on a variety of devices.
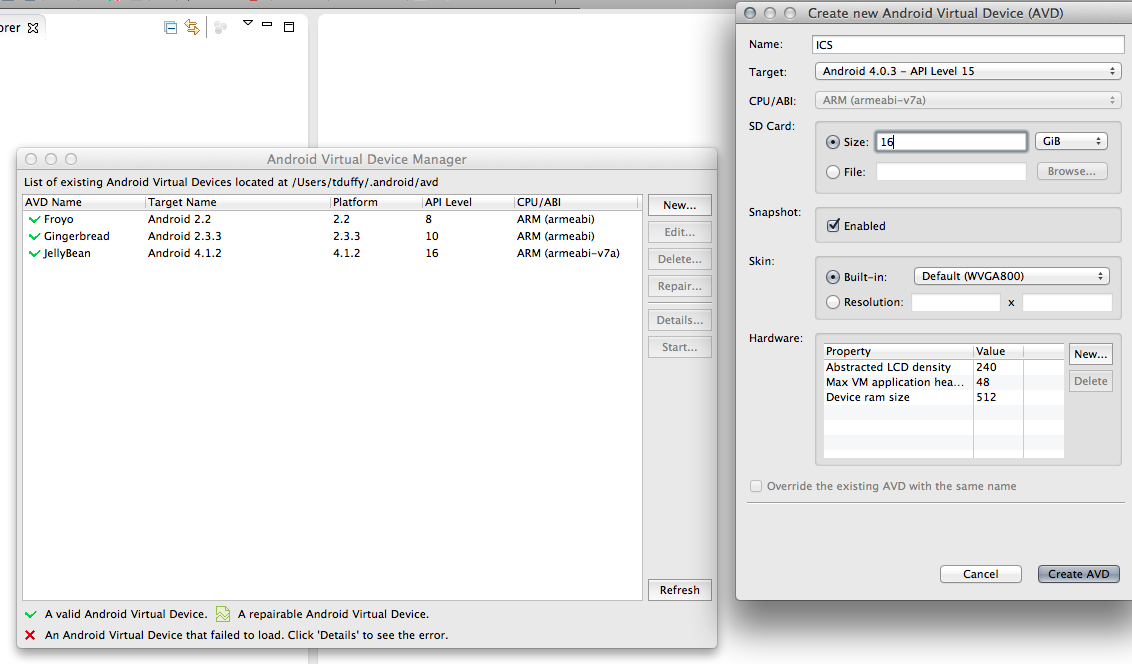
The Device Management View discussed in the book is MOTODEV Studio-specific. You will need to use the AVD instead if you plan to use Eclipse and the ADT. As noted below, Eclipse will start the appropriate emulator for your project when you run it from within the IDE.
6. You are now ready to create your first project. From the File menu, choose New > Other. Expand the Android node and choose Android Application Project. Click Next. Name your project. Click Next.
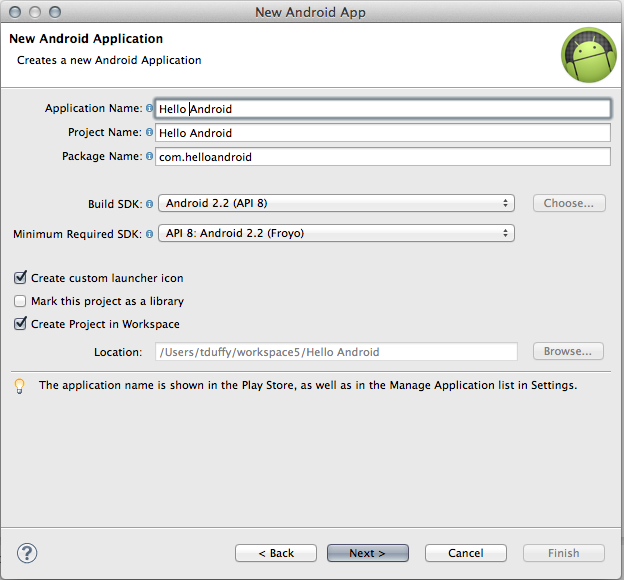
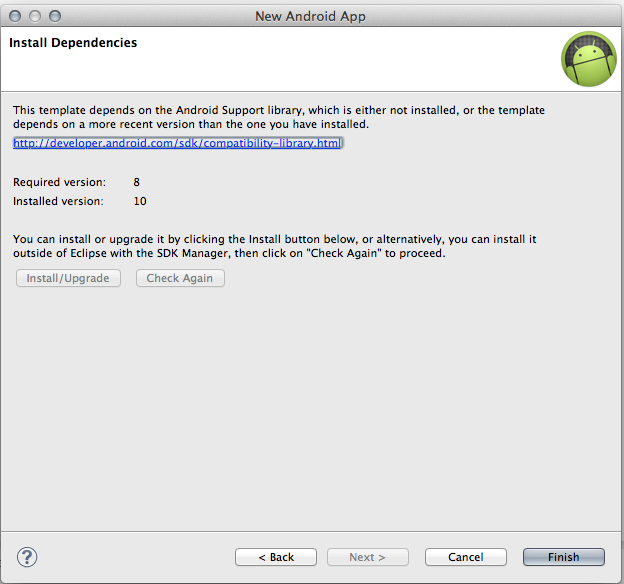
Click Next to accept the default icon settings (you can change these later). Make sure Create Activity is checked and choose Blank Activity. Click Next. Click Next to accept the default settings for your new Activity. If you need to install dependencies, click Install/Upgrade. Click Finish to create the project.
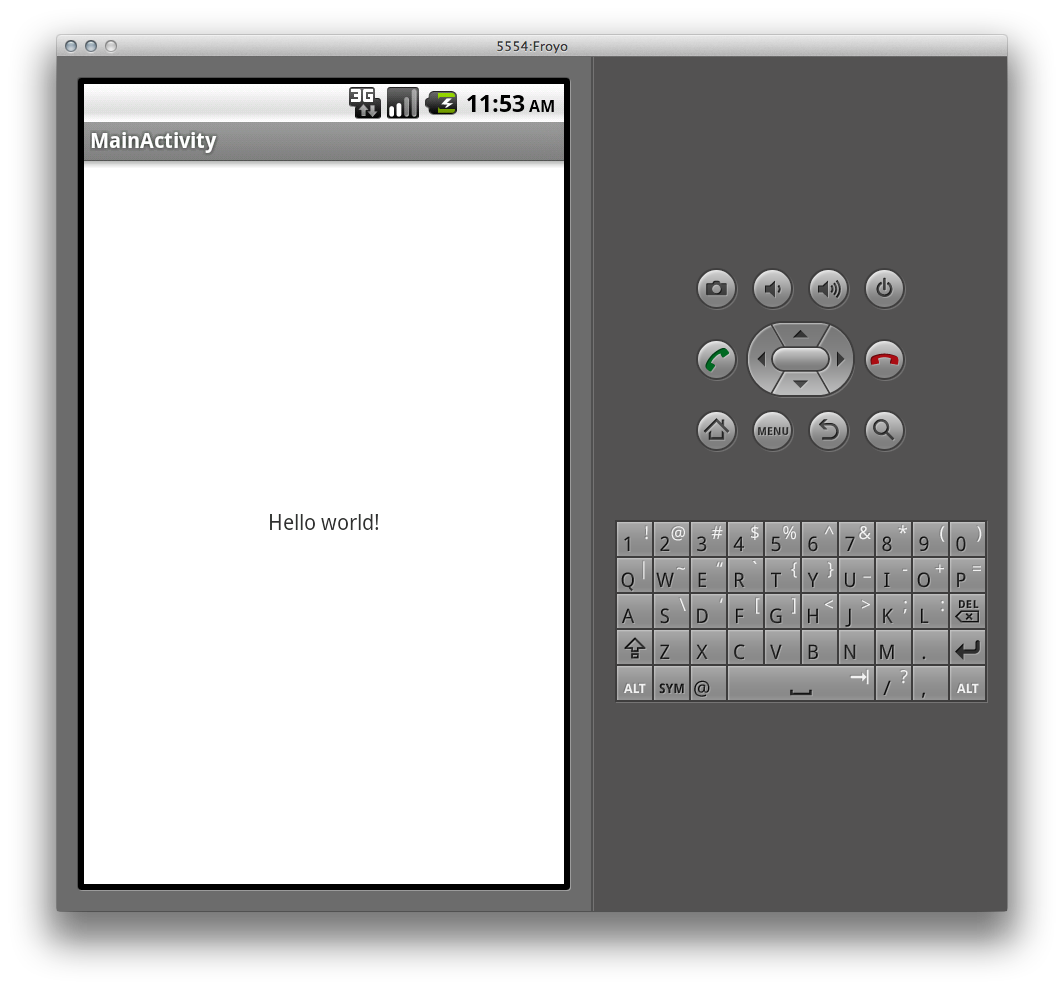
7. Test your install by clicking the Run button ![]() on the toolbar.
on the toolbar.
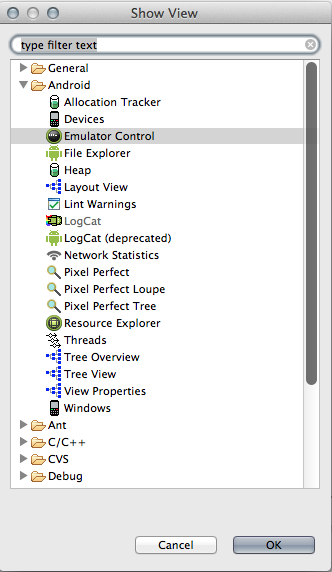
8. You can customize your Workspace by displaying Android-specific views. From the Window menu, choose ShowView > Other. Expand the Android node and select the Views you want to display. I chose Emulator Control and LogCat. You will need the Emulator Control View to complete the Where's My Phone app at the end of the chapter.
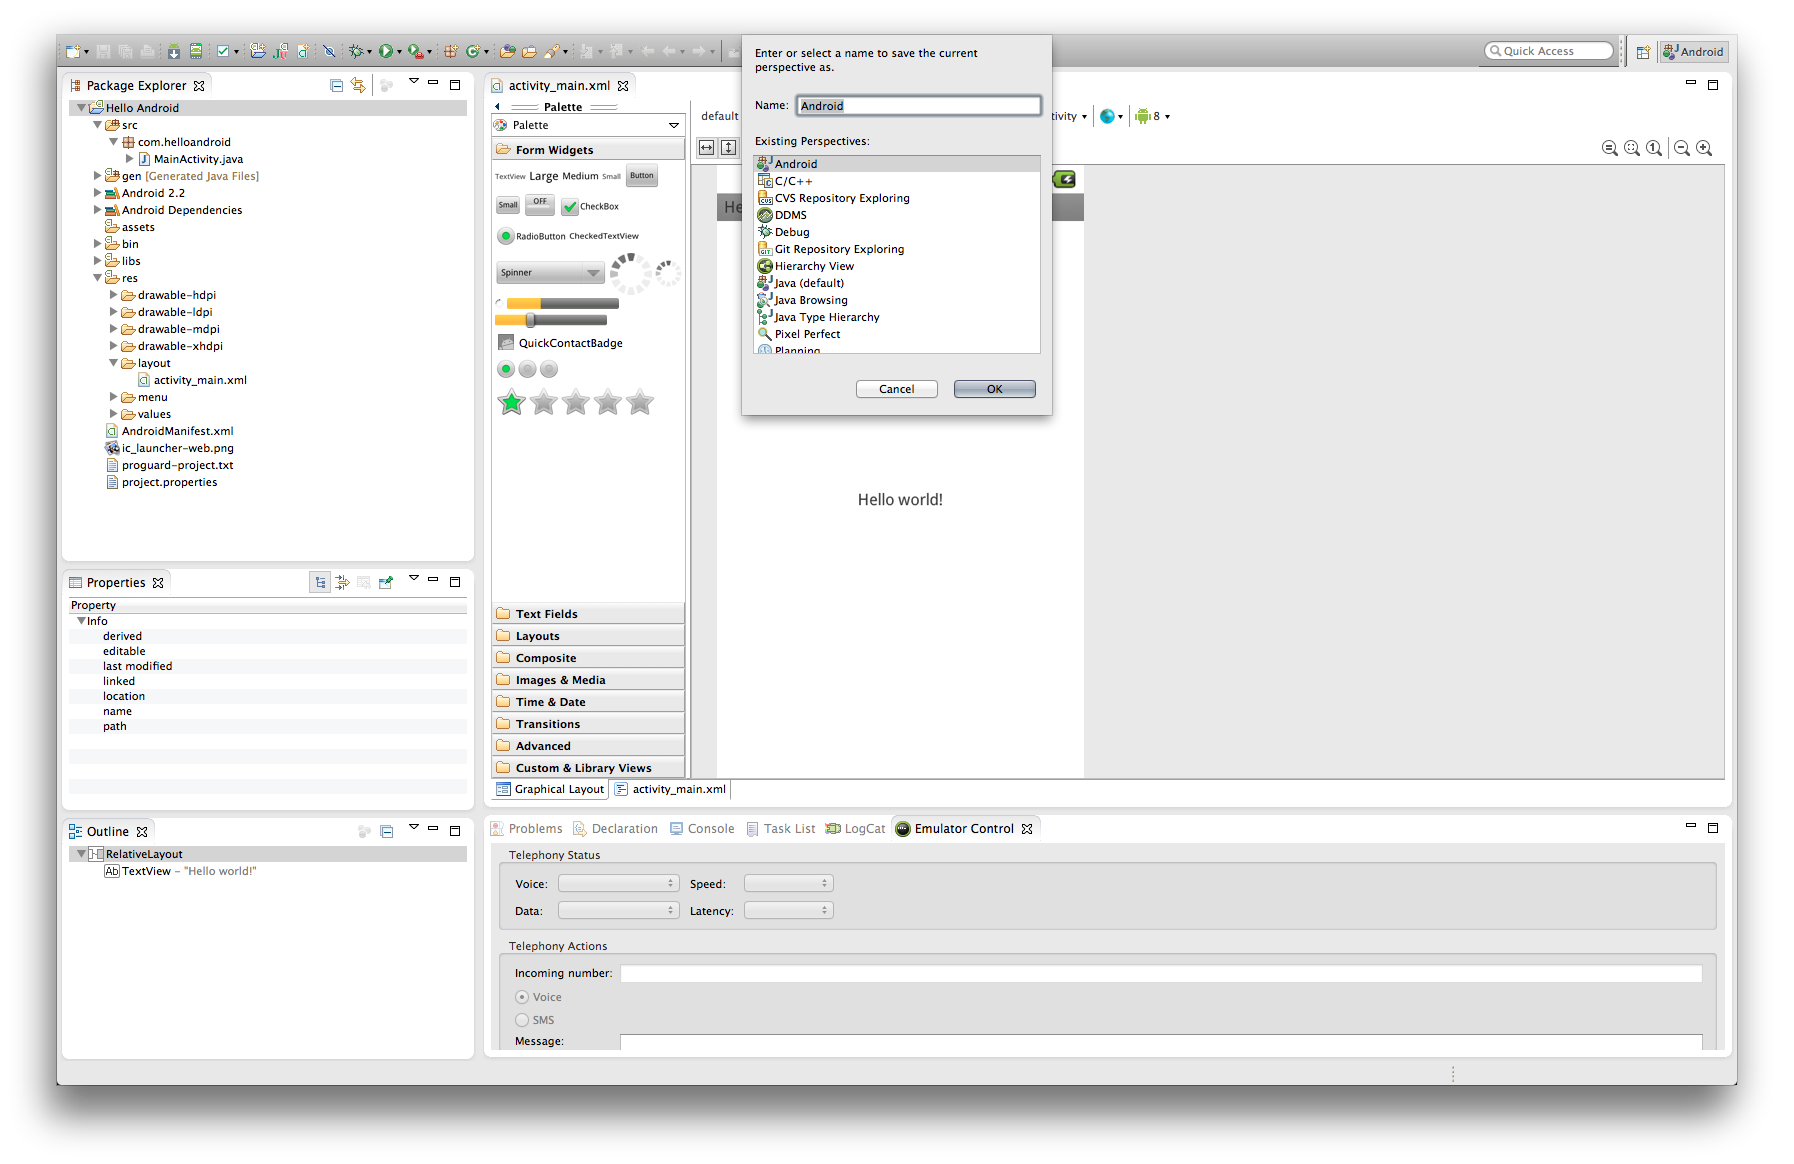
I also chose to move the Outline View and the Properties window beneath the Project Explorer by dragging them there. I moved the Task List down next to the Console. The result is that I've freed up the design area to assume most of the development space. You save your window layout as a perspective. Choose Save Perspective As from the Window menu. Give it a name (I chose to name my custom perspective Android).
You can now open this perspective whenever you wish by choosing Open Perspective form the Window menu. In addition, Eclipse will create a button for toggling between open perspectives in the upper right corner of the IDE.